Showing posts with label winter. Show all posts

Sunday, July 03, 2011

Lion-Neck

It's not very often, in fact I can't remember ever buying a knitting book and wanting to make pretty much every pattern in it, until my copy of Custom Knits arrived from the Book Depository last week. OK, I say pretty much because I can't see the City Cape Poncho happening for me at this time, but hey, who knows ... I've been known to change my mind before ... :D
To decide which pattern to start with first, I did a quick stash check and found that I had 10 balls of Moda Vera Shiver (the same yarn that I just used for my Super Birthday Sweater) ... yep, I bought a heap a while back when Spotlight were selling it off for a dollar a ball!
So after checking out what my fellow Ravellers were saying and knitting, I cast on for the Lion-Neck Cardigan on page 43. (Really, what did any of us do before Ravelry? .. love it, love it!)
This pattern was fast! I was listening to audio books on Librivox (the perfect multitasking ... knitting and reading), and completed this jacket in two mystery novels, A Strange Disappearance by Anna Katharine Green (1880) and The Agony Column by Earl Derr Biggers(1916) :)
If I make this again, and I think that I will be, I'll omit the sleeve shaping completely, to make the fitting look more like the one on the model :)
I can't decide yet whether or not to use the ties ... ?

Sunday, June 05, 2011

The Super Birthday Sweater

I can't begin to tell you how much I love this Super Birthday Sweater from Blue Alvarez! It's the first top down pattern that I've seen that divides the neck edge cast on stitches into quarters as apposed to thirds ... it kinda put me off making it for a while, thinking that it might sit funny when it was on, but I've gotta say that it's totally awesome :) Fits great, sits great, was as easy as, and best of all .. I followed the pattern without changing anything ;D (well, other than omitting the middle stripe!) ... oh, and it's a freebie :)
I used 9 balls of Moda Vera Shiver from Spotlight, (some of which I frogged from a previous sweater) and size 7mm needles. It was really fast to make, beautifully written, and has inspired me to try more top downs with the quarter divisions ... love it :)

Wednesday, April 27, 2011

Green monkeys from Ikea


Thanks to an extra long Easter/Anzac Day public holiday (5 days, woohoo!), I was able to get down to some serious making :)
So I finally finished the tiny baby quilt that I've been working 'off and on again' for the last few months now ... it's a really simple 'cheats' quilt, purely because I couldn't bring myself to cut up the super cute Ikea fabric :D (I love those crazy green monkeys, lol)
It is just Ikea animal fabric on the top, and Ikea red/orange striped fabric on the bottom, with all of the animal designs outlined with 3 strands of embroidery thread :)
I also made a whole heap of baby and toddler hats (most of them have already been gifted, but I'll try to get photos of them soon).
These are two hats that I made from the Ann Budd Handy Book of Patterns that I borrowed from the library ... I love the accessories in this book, knitted from a clever little gauge/size grid. Looking forward to trying the mitts and socks :)
I was intrigued by the sweater pattern, but after getting about half way through knitting one for myself, I decided that the pattern was just a bit too much 80's ... you know, big armholes shapeless body, so decided to frog it and make this Super Birthday Sweater instead. Easy top down knitting and hopefully a nicely fitted shape :) I will try another Ann Budd one soon, because I do like the pattern format, but next time I'll probably stick to a toddler one :)

Wednesday, April 06, 2011

Half a Gargantuan Melon!

I've been looking for a while for some warm winter hats for the little-ies in our family ... I thought that ribbed ones would be a good way to go as the circumference fit doesn't have to be perfect, and they would also allow room for growth. Looking through Ravelry, there were heaps to choose from, but I really liked this one because of the awesome decreases :)
Most were either circular, or swirly or kind of scrunched to have a pom pom on the top ... thought that this one looked more boyish :D
The pattern, Gargantuan Melon, is written for an adult sized, extra large head, so instead of using bulky weight yarn and 6mm needles, I halved the yarn thickness by using 8 ply and used a 4mm needle. It was a bit of a guess as to whether it would fit or not, but the end result was perfect :) I followed the pattern exactly other than starting the decreases after 5 inches instead of 6.25 inches.
I love it! ... there will be more of these hats to come :)

Sunday, July 04, 2010

Quilty bits

Finally, my Rocket Man quilt has made lift-off :)
I had quite a hard time quilting it ... as requested by my daughter, it has a double layer (yep double layer!) of polyester wadding (cold Adelaide nights bbbrrrrr!!). She only wanted the applique shapes to be quilted so that made the job a bit easier ... but even so, I had a few sore fingers for a while :D
So, here is Rocket Man 2010 and I'm happy to say, it is much loved by our little rocket man and his mummy :D

I also finished Fay's quilt ... Fay is my friend's mum, who lives in a nursing home. I made her a lap quilt (about a metre square), just big enough to comfortably tuck in around her legs. I wanted it to be bright and cheery, but not over the top (so I hope that I've got the mix right) ... I also wanted it to be instantly recognisable as her own ... hope she likes it :)


Monday, June 28, 2010

Stephanie's Boobholder

I needed a warm cardi or jacket to wear out last saturday night ... it was only saturday morning that I realised I didn't have anything in my wardrobe to match the rest of my outfit. I had some stash yarn that was the right colour and was thick enough to knit up fast, but even so, I thought it was abit much to think that I could complete it in an afternoon! (but of course, I had to give it a shot :D) ... so, armed with my 2 balls of Katia Himalaya, Stephanie Japel's Boobholder pattern, a cup of tea (several actually!), and some old Taggart re-runs on TV, I set about knitting :D
Ta-daa! ... five, non-stop knitting hours later, it was finished (I even had a perfect button in my stash!). I wore it on saturday night, over a black long sleeved skivvy ... it fits great and feels great, and kept me nice and toasty warm on a cold Adelaide night :)
(The only changes that I made to Stephanie's pattern were to eliminate the puffy sleeves, and to decide, by trying it on, when to divide for the body and sleeves)

Sunday, June 06, 2010

Sweater vest weather

I thought that it was about time to make some more winter warmies :)
....so... my first attempt at a sweater vest for the littley of the family came out 'a tad' too big, lol (I think that it can be
packed away until at least next year...forward planning don't ya know ;D). I took the measurements from my 16 month old grandson's shop-bought vest, did all of the calculations, and used the instructions from Barbara Walker's Knitting from the Top. It was a really easy, seamless knit, think my mistake was not allowing for the huge amount of ease in stocking stitched knits ... ah well, least I know that for next time :)
For the second attempt, I used my Knitware software to be sure of a better fit ... success!...it does fit better, but it also has hilariously funny armholes that make him look like he's wearing shoulder pads :D


...and just to finish off the green-ensemble...a pair of Sucky Thumbs from Marianne's awesome pattern (fast, easy, and they fit! ... thanks Marianne :))

Wednesday, March 31, 2010

Engineered in reverse!

So....I don't know whether to feel a bit good because I managed to copy an awesome baby's jacket from Big W's latest winter range,
or whether I should feel a bit bad for 'stealing' their idea ... (there is a bit of redemption in the fact that the yarn I used was bought from their store!?!) ... anyhow, imitation being the greatest form of flattery and all that, my daughter asked if I could make her a jacket similar to this one in the new Big W catalogue ... (sorry for the blurriness). I already had all of the yarn except the orange in my stash, so after viewing it in the shop, I went home and set about knitting :)
There were some things that I hadn't
tried before ... the knitted on hood with the back 'seam' increases, the zip and placket, and the curved diagonal pockets. I'm really happy with how they all turned out, other than the hood is a little too pixie like (something that I can work on next time). I made this 'test' jacket in a small size (about 6 months), and have now started a bigger one to fit my grandson, who
will be about 18 months when the colder weather arrives in Adelaide. I love what I've learnt along the way, and now have plans to tweek the next jacket to get it just right :)
(In my enthusiasm to get the jacket finished, I forgot to write down all of the construction notes, but this is what I remember of the basics: I used 8ply yarn on size 4mm needles, knitted it top down from the neck edge starting with 54 sts, divided into 24 for the back, 12 for each front and 3 for each sleeve. I increased until there were 52 for the back, 26 for the fronts and 31 for the sleeves. Each colour bar has either 2 or 4 rows of reversed stocking stitch. The body from the underarm is 26 rows, and the same for the sleeves. The pocket started at the top with 8 sts, increasing 1st at rows 7,11,13,15,16,17,18,19,20, then worked straight for about 8 rows. The neck stitches were picked up for the hood, with a stitch marker in the centre back, and then an increase stitch either side of this on every other row, until the hood was the correct width (my first attempt was pretty bad, or actually pretty good if it was being made as a Christmas Elf costume! My second attempt was slightly better ... but not heaps ;D)
... sketchy details I know, but hopefully enough to get some more made :D)

Tuesday, July 21, 2009

Retro Baby

After I finished knitting this cream coloured hoodie, there were a few things about it that I thought could be better ... so, not to let it beat me, I did some tweaking to the pattern, and came up with this blue stripey (and much improved) version :-) ... really!, I'll use any excuse to do some more knitting!! The main thing that I wanted to change was the front neckline, as it came way too high, making the top button sit scarily close to mouth level (the top button is undone and flipped back on the modeled photo). I also tapered the sleeves on the first one, but then found it hard to get them on over his other clothes ... sooo, the new and improved hoodie now has, a scooped out neckline, non tapered sleeves, and I also made it a bit bigger to allow for a wriggly baby! :-D

RETRO BABY ... (so named because it made me think of my Mum's patterns from the '60's!)
I made it to fit a 6 month old, which the cream version does ... the blue one knitted up bigger, just by upsizing the needles. Basically, the two patterns are the same (other than the parts mentioned before) The cream one was knitted Top Down seamless, and the blue one was done Bottom Up seamless ... there was no real reason for this, guess I just needed a change! :-) The hood is not seamless, but I'm sure that it would be fairly easy to change ... soooo, here's the improved pattern :-)
The pattern I am writing is for Top Down, but changing it to bottom up is easy ... just start with 80 stitches for the body, and23 for each sleeve.

The size is roughly 6 months
The gauge is 13sts x 24 rows to 4"using 6mm needles with 2 strands of yarn held together (cream), and 12.5sts x 18 rows to 4" using 7mm needles, again using double yarn (blue)
I used 3 100g balls of Carnival 8 ply acrylic (gotta love Big W!)

TOP DOWN
Using yarn double throughout, cast on 18 stitches.
Knit the first row placing markers after stitch 1,2,16,17
Working in stocking stitch, increase both sides of the markers on every knit row, work 7 rows
On next row, also increase at beginning and end of row
Purl 1 row
Remembering to increase still at the raglan seams, cast on 8 stitches at both ends
Keeping the first and last 4 stitches in garter stitch throughout, work 3 more rows in stocking stitch
Buttonhole row, knit to last 4 stitches, k2tog, yfwd, knit 2
Work 5 more rows stocking stitch
Work stitches to first sleeve, put sleeve stitches on holder, cast on 4 stitches, work to the second sleeve, put sleeve stitches on holder, cast on 4 stitches, work to end
*sorry! there seems to be a mistake here ... it should read 20 rows of stocking stitch and 6 rows of garter stitch before the cast off* Work 13 rows stocking stitch, keeping garter edges, placing buttonholes at rows 25, 35, and 45
Cast off
Return sleeve stitches to needles and cast on 2 stitches at either end
The sleeves can either be knit flat and then seamed, or knit in the round (I did mine in the round using magic loop)
Work 26 rows stocking stitch
Work 4 rows garter stitch
Cast off
For the hood, cast on 63 stitches
Work 4 rows of garter stitch
Work 5 rows stocking stitch
Decrease one stitch each end of next row, then every following 3rd row 5 times
Work 1 row
Cast off
Close up any underarm holes, sew the back hood seam together, sew the hood to the jacket neckline, and finally, sew on the buttons :-)
The hood turns out pretty big, but I like that because his other hats still fit on underneath it, (and I think that most of the time, the hood will just be for show). If you wanted to change the size of it, just cast on a few less stitches, but work the same amount of rows to make sure that the hood and neckline match up.
Don't forget to post any finished piccies on Ravelry! ... would love to see them :-)


Friday, July 03, 2009

Quickie Mini Mitts

I wanted some baby mittens to match the hat that I made a couple of weeks ago ... I tried about 4 or 5 different patterns, but none turned out how I wanted them to look ... so I thought I would try taking the parts of each pattern that I liked, do some knitting pattern fusion, and this is what I came up with :-)

Quickie Mini Mitts

This pattern fits about a six month old, but with it being a top down pattern, it's really easy to adapt to whatever size you want (just continue the increases until it's the right width, and then just keep trying them on until the length is correct).

The yarn and gauge don't really matter either ... I used Moda Vera Harmony with size 5mm needles, which knitted up to 18 stitches and 24 rows.

Using Emily Ocker's cast on, cast on 8 stitches.
Knit 1 round.
Knit front and back into every stitch.
Knit 1 round.
Kfb, k6, kfb, kfb, k6, kfb.

Knit 1 round.

Kfb, k8, kfb, kfb, k8, kfb (24 sts)
Continue knitting around on these stitches for about another 13 rows (I used the magic loop method).
K1, yarn forward, k2tog across the next row (eyelet row).
Knit 4 rounds.
Purl 1 round.
Knit 1 round.
Purl 1 round.
Knit 1 round.
Cast off.
Make two wrist ties to thread through the eyelets, and one long connecting cord to attach both mitts. I found that the easiest and neatest way, was to do a simple crochet chain, but an i-cord or ribbon would do the same :-)
(Emily Ocker's cast on is awesome ... I've been trying to get my head around it for ages, ever since I read about it from Elizabeth Zimmermann ... I just couldn't figure it out from Elizabeth's instructions, so googled it, and came up with the above link ... really it's heaps easy and really effective ... I also found a version used for starting crochet circles, which is pretty much the same thing ... it's called the
Magic Adjustable Ring)


Wednesday, June 17, 2009

Warm ears and cosy sleeps ...

Finding a hat pattern to perfectly fit a baby's head is not that easy ... finding an online hat generator however, to design a hat in your own yarn, and to your own measurements, is as easy as clicking here :-D ... how cool are those ear flaps?! I thought that I'd made some sort of mistake whilst I was knitting it... having never made (or worn) ear flaps before, I imagined the flaps to be exactly opposite each other, but (very cleverly) they're not, they are positioned a lot nearer to the back than the front. The result is a hat that fits so well, that it doesn't move about, or need adjusting every few minutes ... love it! ... my only change to the pattern was to do a few less rounds in the main body of the hat ... other than that, I followed the pattern (surprised eh?! ... yep, me too!)
I finally finished a baby quilt that seems to have been waiting around forever. The top is all machine pieced, so that really didn't take too long ... the waiting was just for the quilting to get started (but as soon as it was, it only took a few days to complete). I placed the quilt top directly onto the backing, and hand quilted it, using 3 strands of embroidery thread. I'm not sure what the backing fabric is called ... it's got a really soft fleecy/furry kind of feel (it's the same fabric that heaps of this seasons dressing gowns are made out of) ... I'm sure it's got a name, but I just didn't think to look when I bought it from Spotlight ... maybe I'll remember to check next time I'm there :-D (but, whatever it's called, it's soft, warm, and very snuggly ... and perfect for this Adelaide winter)

Tuesday, April 21, 2009

Mattress Stitch....who knew?...

I've never been a big fan of sewing my knitting together...I know, I'm not alone ;-D
My mum taught me when I made my first sweater in primary school...but I don't think that I ever really got it right. She lays out the knitting with wrong side facing up, and carefully catches just the edge stitches together, resulting in a perfectly flat seam ... when I do the same, yep, I get the flat seam on the inside, but a sometimes ugly seam on the outside ... unlike Mum's, which look perfect front and back...!?
So I figured that it was time to try a different approach ... and OMG, I am so in love with Mattress Stitch right now ... admittedly, the inside seams are a bit on the chunky side, but the look on the outside is worth the sacrifice ... and, and, and! not only do they look great, but I'm actually really enjoying doing them :-) I made this sweater for our new grandbaby, to practice the seams on something small, and I love the way it turned out :-)

The specs ...... I used
just the basic baby, drop sleeved pattern from my Knitware program, with some Shepherd 'Colour For Me' 8 ply yarn (bought cheap, as usual from Big W's yarn stock clearance last year (woo!)).
The awesome tutorial for Mattress Stitch can be found here.

Tuesday, June 03, 2008

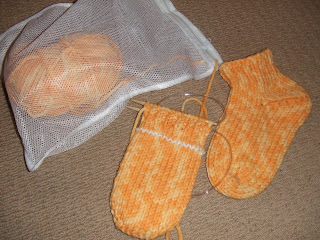
Zoomy socks

...another pair of easy, easy socks :-) They really are just a magic looped tube with a bit of tweaking on the toe and heel
Yarn: Just over one ball of Panda Zoomy (I used 115g)
Gauge: 12st x 19rows = 10cm on size 7mm needles
Using the Turkish Cast On, make 8 wraps of the needle (16 stitches in total, 8 for each side),
then increase each side, every other round, until there are 14 stitches on each side. Continue knitting without shaping for about 20 rows, and then work half of the stitches on waste yarn for an Afterthought heel.
Finish the sock with a couple of rounds of stocking stitch and some ribbing before returning to the heel. Pick up the 28 stitches, and a couple of extra stitches each side to eliminate any holey bits, and decrease each side, every other round until there are 15 left....then it's just casting off the remaining stitches using the 3 Needle Bind Off.
These socks are great for wearing around the house in the winter ... warm, cozy, soft ... and they let you do an awesome Tom Cruise Risky Business style slide across the hardwood floor ...
not that I would do anything that silly of course ;-D
... although, I've 'heard' that it IS a great way to dust!


Wednesday, April 30, 2008

Op Shop Top

Finally....I have a knitting FO to show :-) (and just in time for Adelaide's cold snap!)
This was a jumper that I started in December after buying a bag of grey yarn from the Op Shop....it was just a mixed bag of assorted yarns in different weights and textures, that only cost a few dollars.
With knitting it top-down (thanks as always to Barbara Walker's 'Knitting from the Top'), I was
able to knit each stripe until the yarn ran out. The first one I used was Patons Cottage Knit, which was a chunky, slubby mix - this determined the gauge (very roughly!), and the needle size. With the rest, I then just doubled or tripled them to give a similar gauge. I added some shaping through the waist, with 4 darts, and by using a slightly thinner yarn. The neckline had a 'roll' happening that would have been annoying to wear, so I just crocheted a row of htr's around the top to pull it flat...it still needs blocking to help it to sit better, but hey...that can wait until the jumper needs washing ;-D


....and of course, as ever!...for every one FO, there are
one or two!!! UFO's waiting in the wings....;-D

Tuesday, March 04, 2008

Doubling up!

Considering that I haven't blogged for a few weeks, you'd have thought that I could have come up with something original ... but no! ... all of my knitting has been a complete repeat of my last two projects :-) I loved knitting my first Bad Penny so much, that I started another one! (I just love using this Sean Sheep Armytage wool ... in my stash I still have 9 balls of white/blue and 2 balls of mustard/yellow. This Bad Penny only takes 5 balls, so I should have enough of the white to make a long sleeved jumper, and maybe get a neckwarmer and wristies out of the yellow).

The other 'repeat' knitting was another pair of winter socks ... I tried doing the Afterthought heel on two thirds of the stitches this time (as per EZ's instructions), but thought they looked a bit odd, so I went back to using a half ... they're still better than the last pair though, because this time I didn't forget to pick up a few extra stitches at either side of the heel, to avoid holes (I did 4 on each side) ... think I may be adventurous next time, and try a different heel :-D

Tuesday, February 12, 2008

Bad Penny

This is my slightly shortened version of Stephanie Japel's Bad Penny. In keeping with my stash down plans for this year (of course, this will only last until Lincraft or Spotlight have their next big yarn sale!!), I used 5 balls of Sean Sheep Armytage (yep, the reason for the shorter length is because I just knitted down until my yarn ran out...couldn't do that if it wasn't knit from the top :-)) I added a bit of waist shaping with the help of Barbara Walker's Knitting from the Top and omitted the lacy increases and edgings....but other than that, I pretty much followed the pattern ;-D
I started knitting this top before Christmas, but it was just too hot and sticky to be knitting with a thick wool at that time of year (trying it on all the time to get the fit right was just the worst!!) ... we had a couple of cooler days last week, so I made the most of the change, and finished it off...all in all, it probably only took a few days to knit. I have another 5 balls of the same yarn in a different colour, so I think I may be starting another one soon :-)
I'm liking the layered look again for this winter...just perfect for Adelaide :-)